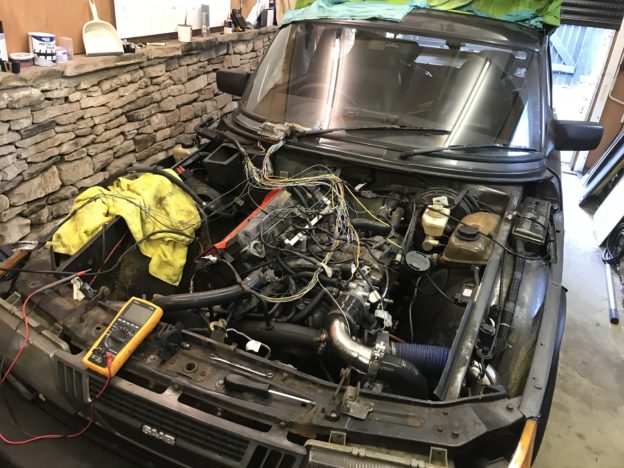
An ambition of mine for some time now has been to convert Helga to run the Trionic engine control system as fitted to later 9000s and NG900s. This replaces the old distributor ignition setup and the LH2.2 fuel system with fully live-mappable control of ignition and fuelling, coil on plug ignition with ion discharge knock detection and more. There’s plenty of documentation out there on the swap so I’ll not go into too much depth.
I also needed to keep Helga’s downtime as short as possible because she’s my daily car, so I tried to have as much in place as possible while keeping her running.
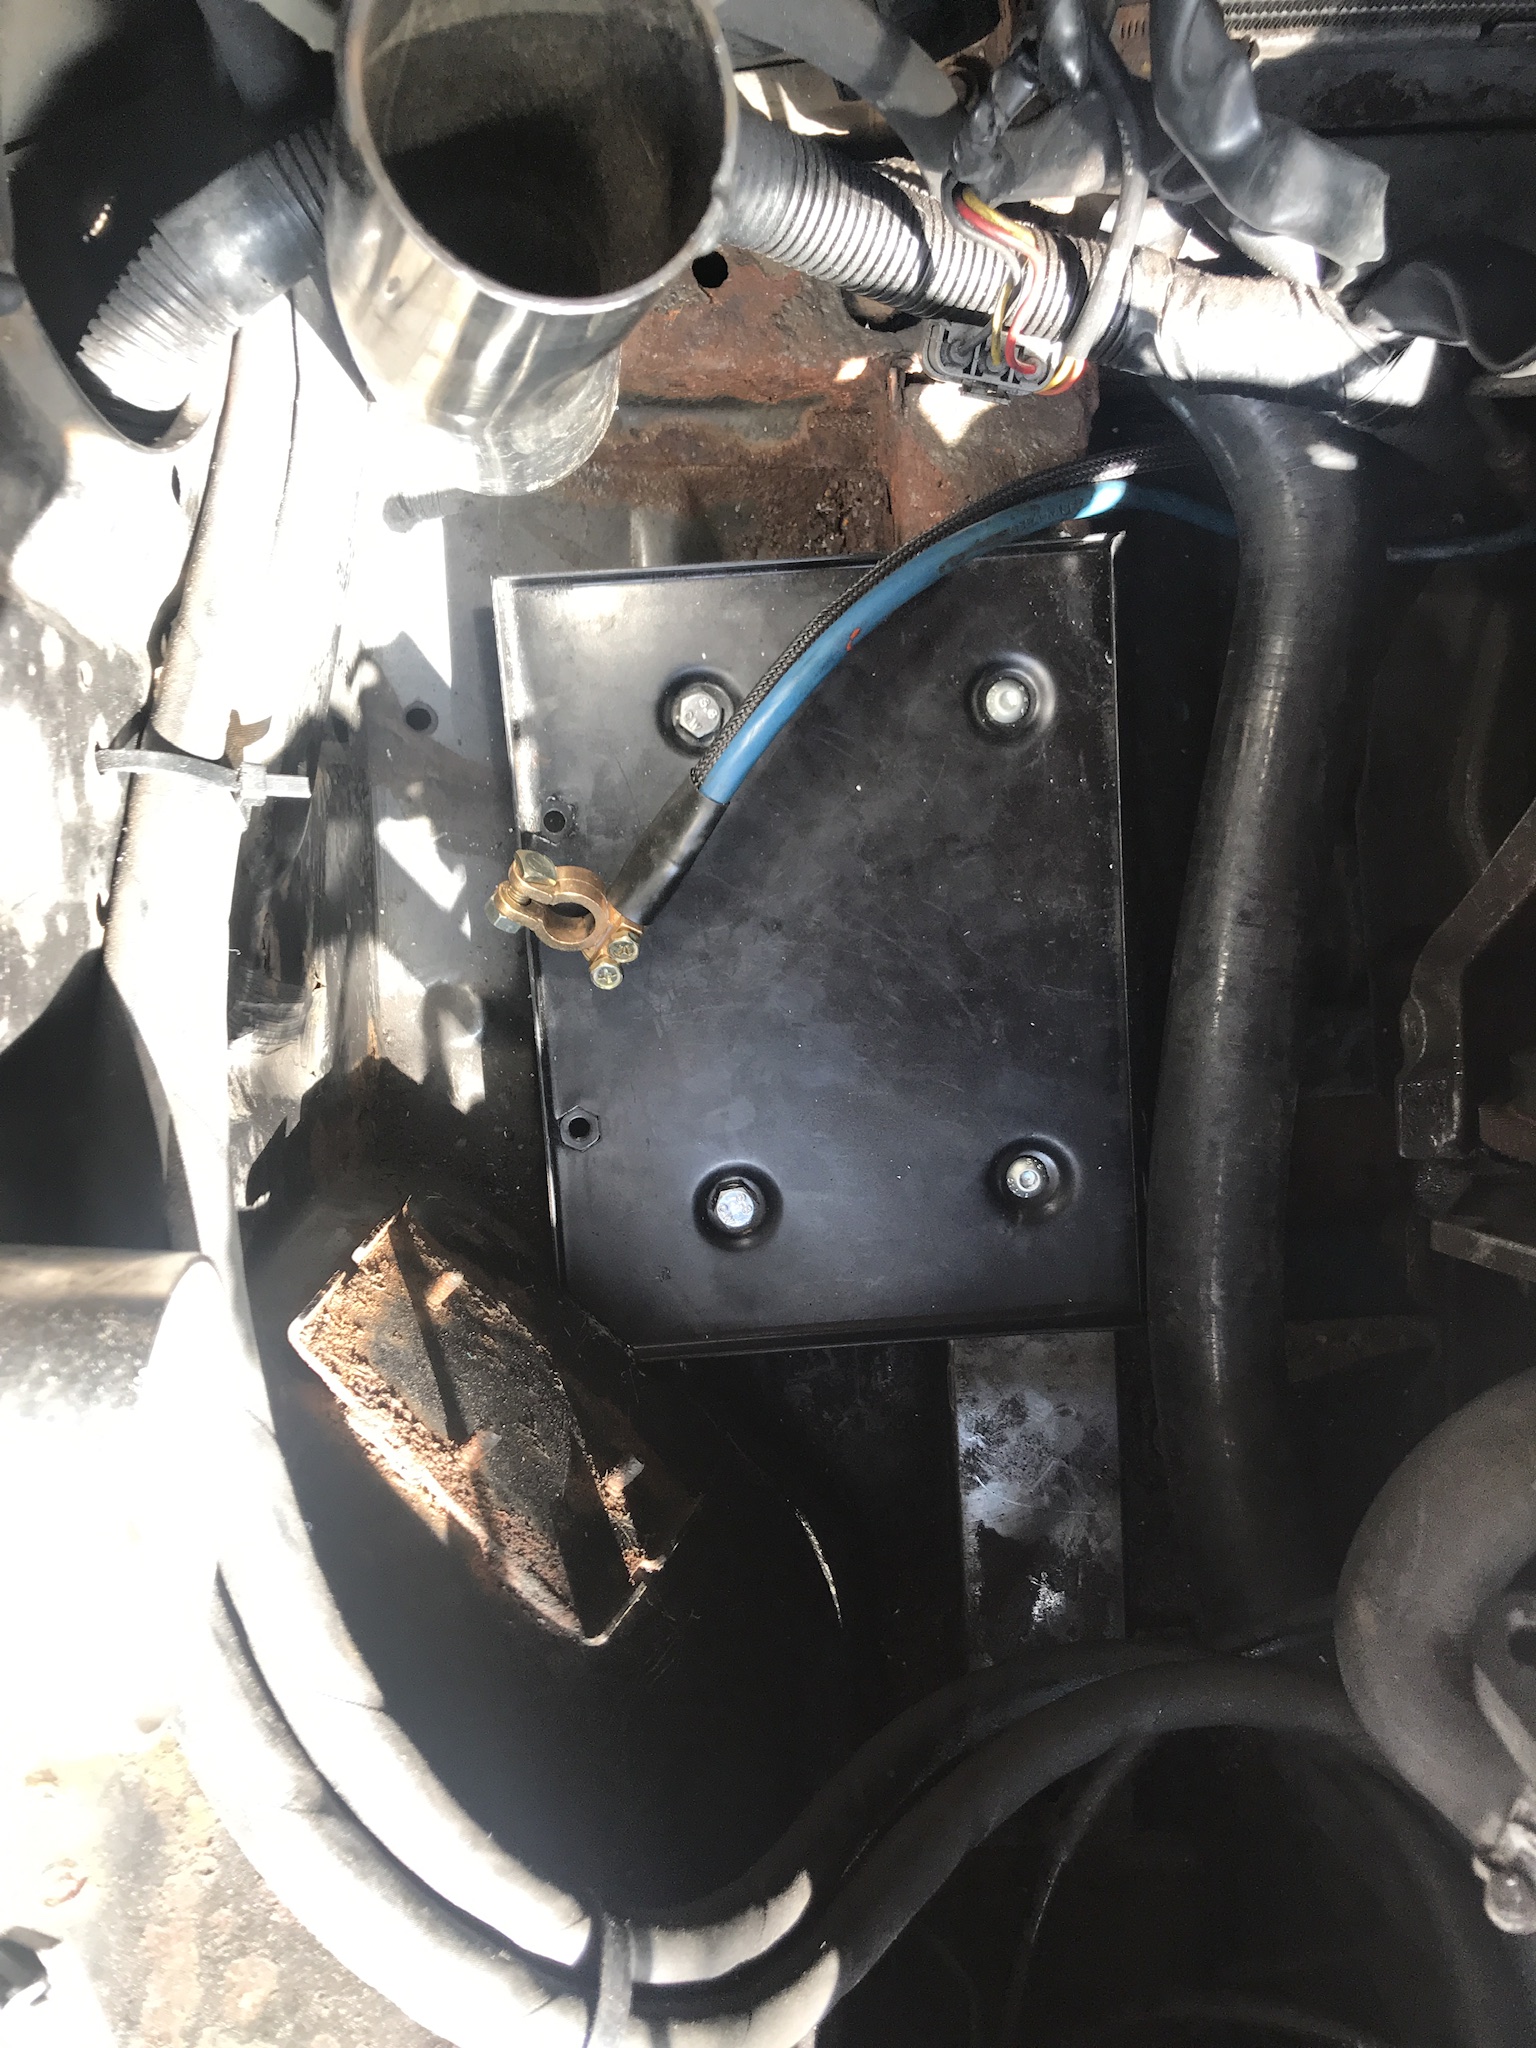
First, not essential at all for the swap, I relocated the battery to the other side of the bay away from the downpipe. It’s now where the air box would be located.
The hardest part of the swap is sourcing a signal for the crank position sensor. I chose to get a pattern cut into the back of the flywheel. Because my existing flywheel was lightened, there was nothing left to cut the pattern into, so I sourced a standard later 900 flywheel which takes a 228mm clutch.
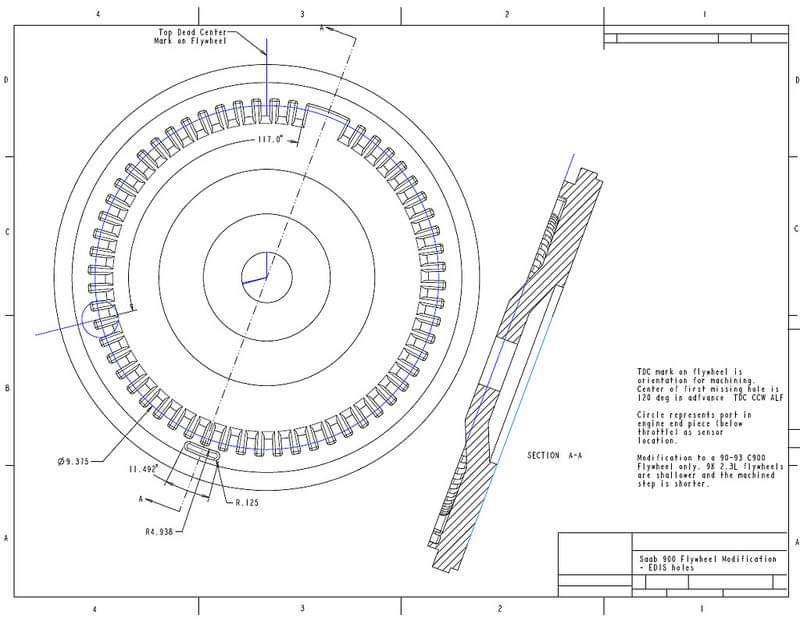
The pattern 
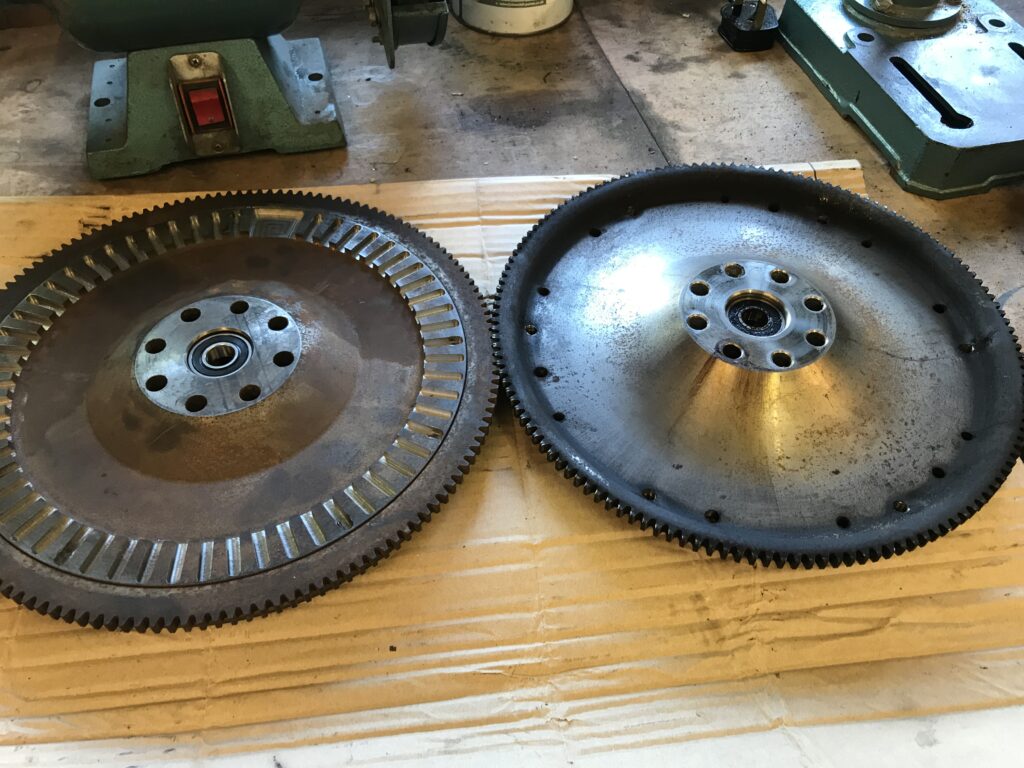
T5 flywheel vs lightened 9000 flywheel
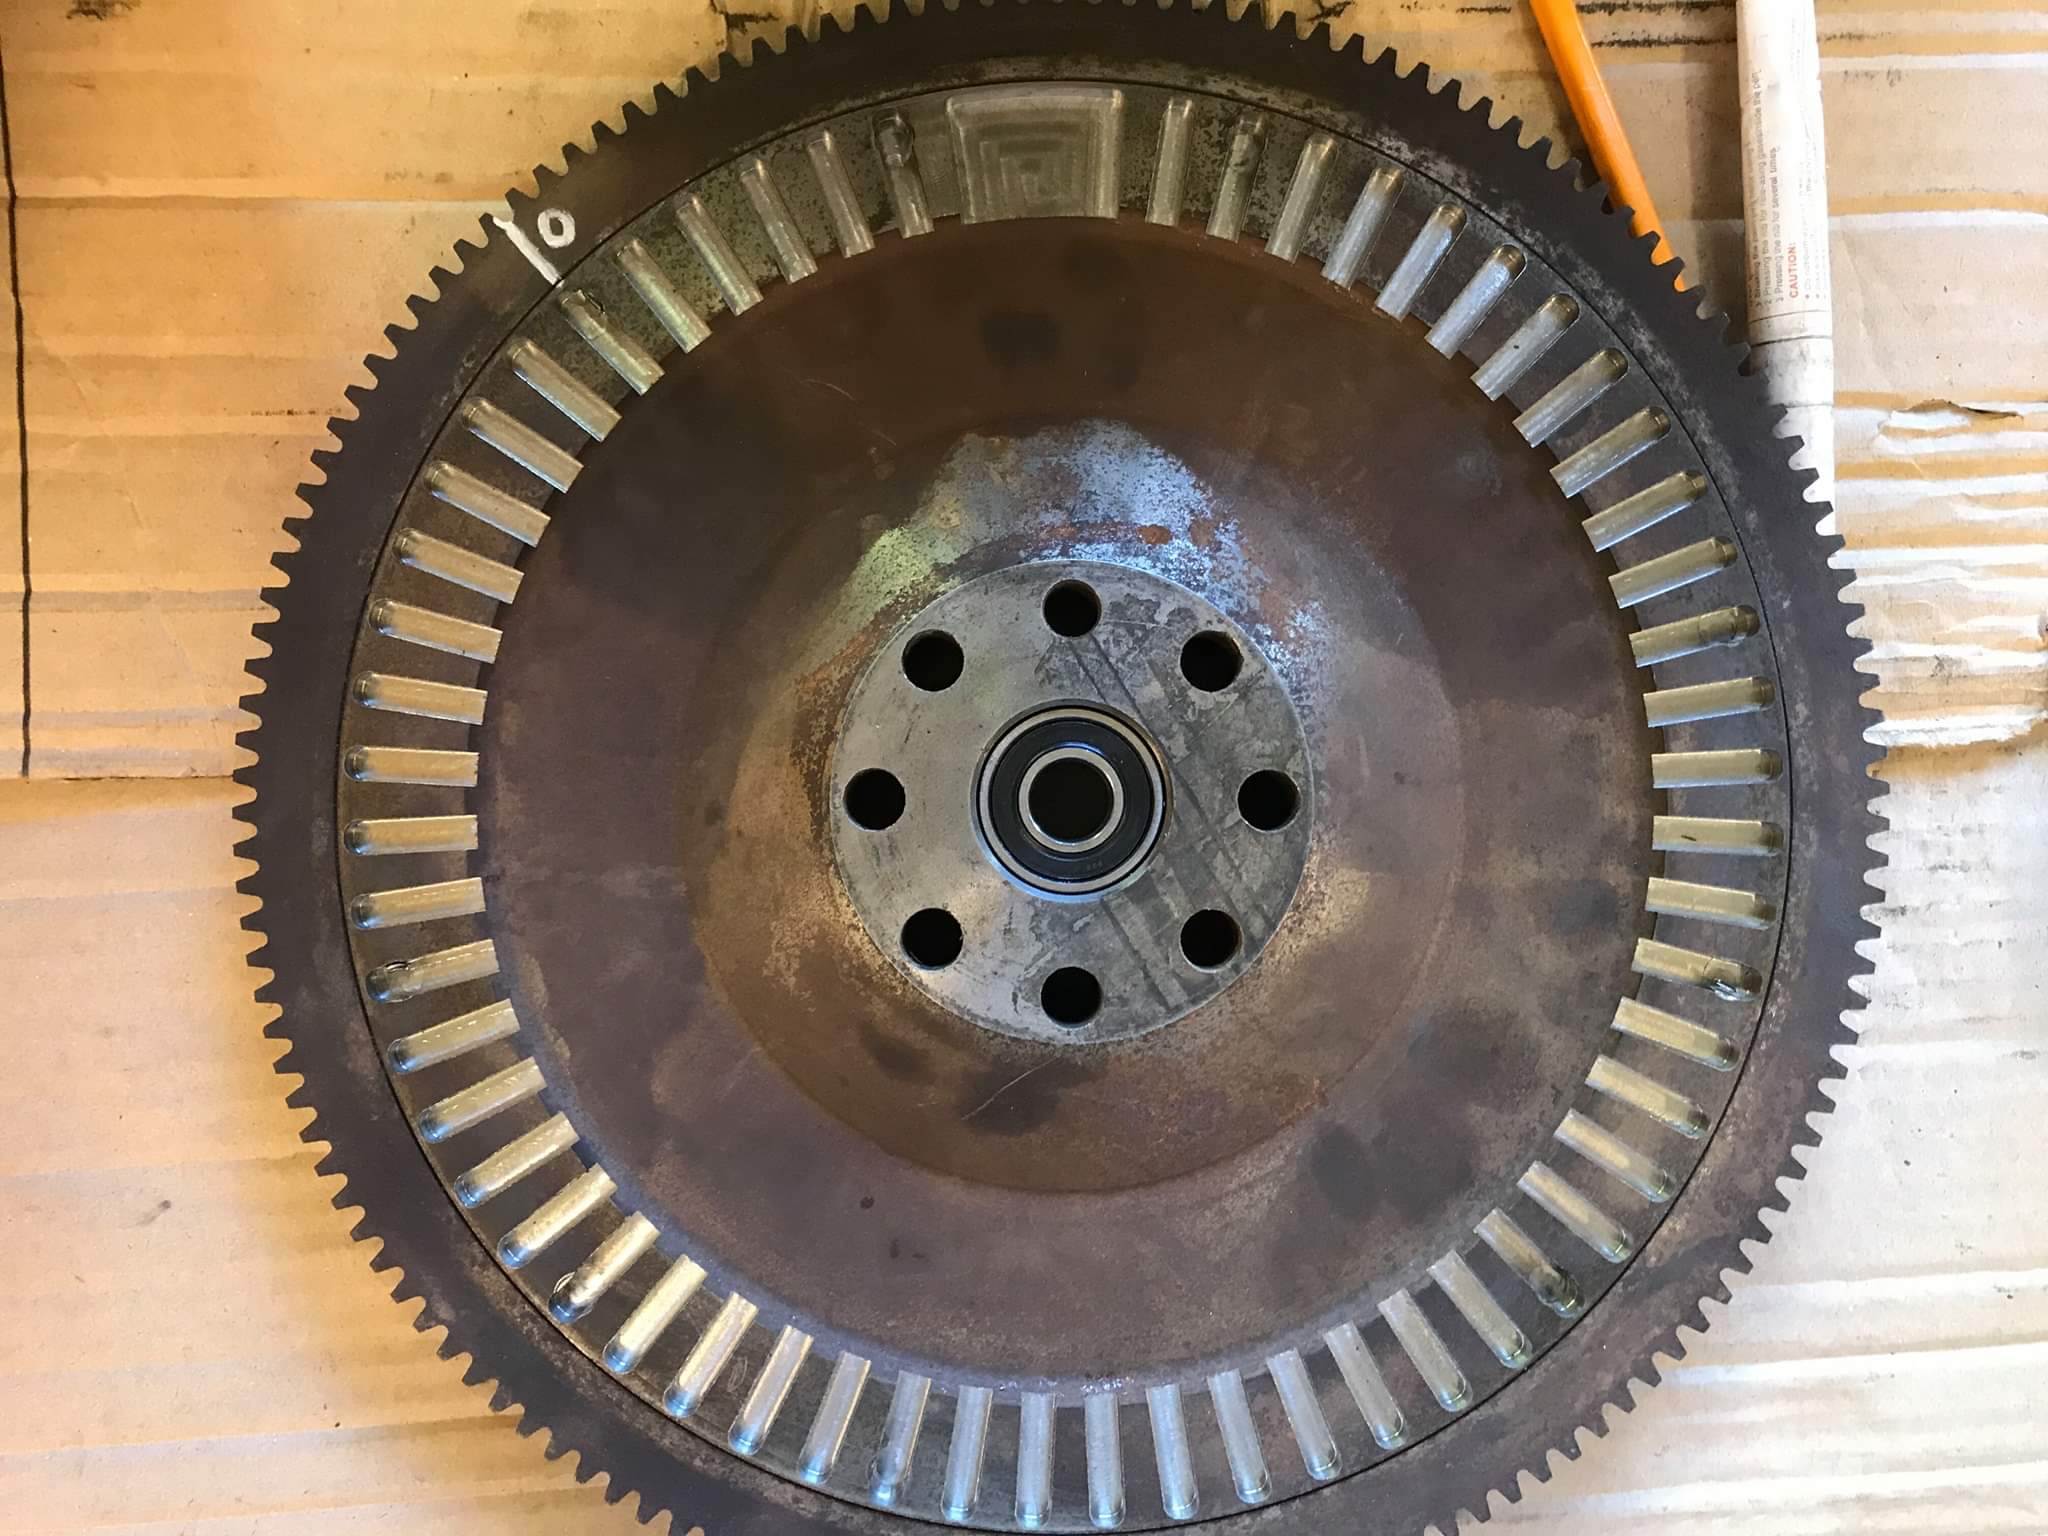

This was the fourth time I’d had the clutch apart in my ownership, so I removed the lightened 9000 flywheel/240mm clutch setup and fitted the 90-93 900 flywheel cut for T5 by JamSaab with a Sachs 220mm clutch. Annoyingly I ordered what was supposed to be a 228mm clutch and got a 220mm. This turned out to be a problem.
So at this point I fitted everything for the T5 swap bar the actual loom – so the intake temp sensor, 9000 throttle body with different throttle position sensor, crank position sensor, map sensor etc, all sourced from a scrap Saab 9000, were all fitted but left disconnected ready for the actual swap over. I also fitted a braided clutch line while it was apart.
So I drove the car like that for a few weeks still running the old LH2.2 management, including to this year’s Oulton Park Gold Cup:
After that it was time for the final step of the T5 swap – splicing in the Saab 9000 loom and fitting the ECU.

I used a combination of the above wiring diagram and guide. The marked colours matched my loom perfectly but I still checked every pin went where I expected on the ECU connector.
The loom I used didn’t have the MAP or boost control valve wiring so they had to be added off the body connector, then it was a case of adding power via the twin relays borrowed from the old loom, the power block on the driver’s side wing and the ignition live pinched from the old coil power wire. Grounds were fastened to the thermostat housing, the speed signal and check engine light spliced into the wires under the dash. All in, removing the old loom and swapping to the new took a little under a day though I had spent another evening marking all of the wires in the new loom. It still could do with taking off again and bundling up properly but for now it’s tie wrapped out of harm’s way.
Impressively it started on first turn of the key with only one hiccup. Where I was told to put the CPS (in the pre-existing hole) was in fact 18 degrees too far advanced. Turned out that the hole we initially drilled in the backplate above that was nearly bang on at only a degree out, checked with a timing gun. I don’t understand what’s gone on with my flywheel milling to require that. Now that’s sorted she’s running nearly as sweet as a nut.
The problem now is that the 220mm clutch can’t handle the power. This is running a 9000 B204L (185bhp) map that I’ve taken to stage one with a bit more boost at the top end and a bit less at lower rpm, as well as the T7 valve mod. I’ve tried shimming the pressure plate 2mm away from the flywheel to increase the pressure from the fingers but despite making the pedal heavier this still hasn’t cured it. In third and up there’s half a second or so blip in revs as the boost hits around 1 bar.
Another problem was the alternator bracket blot sheared itself off in the block(?!). Noticed the bolt holding the adjuster arm to the block was hanging out, and closer inspection with a mirror revealed it had sheared. There’s no space between the block and the firewall to get in with a drill, so for now I’ve made a temporary adjuster bracket off a spare hole above the water pump. I bet that stays that way for a very long time.
